
Content
The Magic of No-Cook Playdough
Why no-cook? It’s faster, often uses ingredients you already have in the pantry, and younger children can be more involved in the mixing process (with supervision, of course!) without the risk of hot pans. The texture might be slightly different from cooked versions – sometimes a little denser or stickier initially – but it’s just as pliable and fun. The key is getting the ratios right and a bit of enthusiastic kneading.Classic No-Cook Salt Dough Recipe
This is the go-to, tried-and-tested recipe that rarely fails. It relies on the reaction between the hot water and the flour/salt mixture to create that doughy consistency. You’ll need:- 2 cups plain flour (all-purpose flour works best)
- 1 cup salt (fine table salt dissolves better)
- 2 tablespoons cream of tartar (this helps with elasticity and preservation)
- 2 tablespoons vegetable oil (or any mild cooking oil like canola or sunflower)
- 1.5 cups boiling water (handle with care!)
- Optional: Food colouring, glitter, scents (more on this later!)
- In a large mixing bowl, whisk together the dry ingredients: flour, salt, and cream of tartar. Make sure they are well combined to avoid salty lumps.
- Add the vegetable oil to the dry mixture. It won’t fully combine yet, that’s okay.
- Adult step: Carefully pour the boiling water into the bowl. If adding liquid food colouring, mix it into the boiling water before pouring for even colour distribution.
- Immediately start mixing with a sturdy spoon or spatula. It will look like a shaggy, sticky mess initially. Keep stirring vigorously!
- Once it starts coming together and is cool enough to handle (but still warm), turn it out onto a lightly floured surface.
- Now comes the fun part – kneading! Knead the dough for 5-10 minutes. It will start sticky, but as you knead, it will become smooth, soft, and pliable. If it remains too sticky after 5 minutes, add a tiny bit more flour, a teaspoon at a time. If it feels too dry, add a few drops of water or oil.
- Once smooth, your playdough is ready!
Adult Supervision is Essential! The classic no-cook recipe uses boiling water. An adult must always handle the boiling water and the initial mixing stages when the dough is hot. Ensure the dough has cooled sufficiently before letting children knead it.
Super Soft Conditioner Dough (2 Ingredients!)
This one is incredibly simple and results in a uniquely soft, silky dough. It’s not quite traditional playdough, but it’s fantastic for sensory play. You’ll need:- 1 part hair conditioner (choose a cheap, creamy one – scent optional!)
- 2 parts cornflour (cornstarch)
- Put the conditioner in a bowl.
- Gradually add the cornflour, mixing as you go. Start with about half the cornflour, mix, then add more until it forms a soft, non-sticky dough.
- You might need slightly more or less cornflour depending on the consistency of your conditioner.
- Knead briefly on a surface dusted with cornflour until smooth.
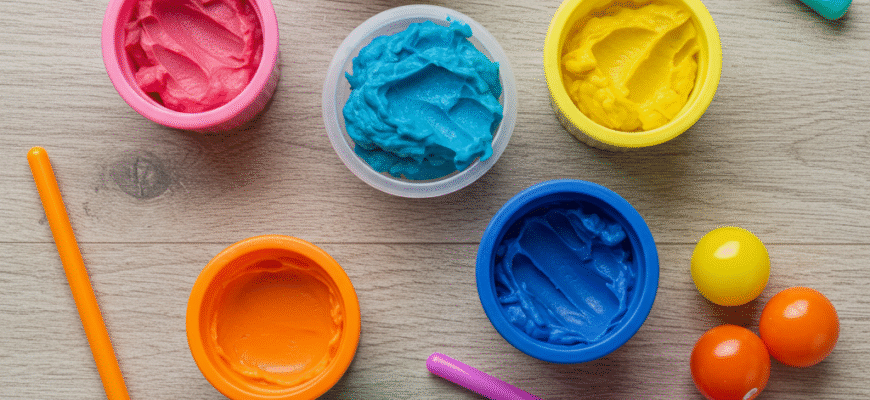
Colouring Your Creations
Plain playdough is fun, but adding colour takes it to a new level! There are several ways to do this:Liquid Food Colouring
This is the easiest method for the classic salt dough recipe. Add it to the boiling water before mixing it with the dry ingredients. This ensures even colour distribution without staining hands during the kneading process (too much). Start with a few drops and add more for bolder colours.Gel Food Colouring
Gel colours provide much more vibrant, intense shades. You can add these to the water like liquid colours, or you can knead them into the finished plain dough. To knead in colour: flatten the dough ball, add a drop or two of gel colour in the center, fold the dough over the colour, and knead, knead, knead! Wear gloves for this method to avoid stained hands, as the concentrated gel can take a while to fully incorporate.Natural Colours
Want to avoid artificial dyes? Try natural powders!- Pink/Red: Beetroot powder, paprika (use sparingly for colour, might add scent).
- Orange: Turmeric (can stain!), annatto powder.
- Yellow: Turmeric, mustard powder (use sparingly).
- Green: Spirulina powder, matcha powder, spinach powder.
- Brown: Cocoa powder, instant coffee granules (dissolved first).
- Purple: Blackberry or blueberry powder (or juice concentrate added with water).
Test Natural Colours First. Some natural colourants like turmeric can stain surfaces and hands quite easily. Cocoa powder will make the dough smell chocolatey! Always start with a small amount of natural powder and add more until you reach the desired shade.
Adding Scents for Sensory Delight
Engage another sense by adding pleasant smells to your playdough! This enhances the sensory experience and can be calming or invigorating.Extracts and Essences
A few drops of vanilla, peppermint, lemon, or almond extract from your baking cupboard work wonders. Add these along with the oil or knead them into the finished dough. Peppermint can be energizing, while vanilla is often calming.Essential Oils
If using essential oils, ensure they are kid-safe and use them very sparingly – 1-2 drops per batch is usually plenty. Lavender (calming), sweet orange (uplifting), or chamomile (soothing) are popular choices. Always check safety guidelines for specific oils and ages, and avoid ingestion. If unsure, stick to food-grade extracts.Spices and Drink Mixes
Cinnamon, nutmeg, or mixed spice added to the dry ingredients create warm, inviting scents – perfect for autumn-themed play. A teaspoon of unsweetened powdered drink mix (like Kool-Aid) can add both colour and a fruity scent simultaneously! Add this to the dry ingredients.Playtime Ideas and Storage
Once your colourful, possibly scented dough is ready, the fun begins! Provide simple tools:- Cookie cutters
- Rolling pins (toy or real)
- Plastic knives and forks
- Bottle caps, buttons, pasta shapes for pressing patterns
- Small toy figures or vehicles
Storing Your Homemade Playdough
To make your creations last, proper storage is key. Homemade playdough, especially salt dough, can dry out quickly if left exposed to air.- Wrap each colour tightly in cling film (plastic wrap).
- Place the wrapped balls inside an airtight container or a zip-top bag.
- Store at room temperature or in the fridge (refrigeration can make it last slightly longer, but it might feel cold and stiff initially – let it warm up before playing).


