
Content
Why Embrace the Shaving Cream Mess?
Beyond the sheer joy factor, engaging in shaving cream art offers several developmental benefits for young children. It’s more than just smearing foam around; it’s a valuable learning experience disguised as play. Let’s break down why you should consider adding this to your activity rotation:- Sensory Exploration: As mentioned, the tactile nature is huge. Kids get to feel the texture change as colors mix in and as it gets spread thin or stays in peaks. This exploration helps them process sensory information.
- Fine Motor Skills: Manipulating the tools (or just their fingers!) to swirl the colors, spreading the cream, holding the paper, and using a scraper all help strengthen hand muscles and improve coordination. These are crucial skills for writing, drawing, and daily tasks later on.
- Color Mixing and Theory: What happens when blue and yellow swirl together? Kids get a firsthand look at color mixing in action. It’s a practical, visual science lesson that’s much more engaging than just talking about it.
- Creativity and Imagination: There’s no right or wrong way to do shaving cream art. Children are free to experiment with patterns, color combinations, and swirling techniques. This freedom fosters creative thinking and self-expression.
- Focus and Concentration: The mesmerizing process of watching colors swirl and blend can actually help children focus their attention. They become absorbed in the activity, developing their ability to concentrate on a task.
- Process Over Product: This activity emphasizes the enjoyment of creating. While the marbled paper is a cool result, the main fun lies in the messy process of mixing and transferring the patterns.
- Affordability: You don’t need expensive art supplies. A can of basic shaving foam (not gel!) and some food coloring or washable paint are usually the main costs, making it an accessible activity for most families.
Gathering Your Marbling Supplies
The beauty of this craft lies in its simplicity. You likely have most of these items already hanging around your house. Here’s what you’ll need to get started:- Shaving Cream: The classic white foam kind works best. Avoid gels, as they don’t spread or hold the color in the same way. The cheaper, the better usually!
- Liquid Food Coloring or Washable Paint: Food coloring gives vibrant results, but washable paints (like tempera) are a great alternative, especially if you’re concerned about staining. Use liquid forms for easy dropping and swirling.
- A Tray or Container: A baking sheet with sides, a plastic storage bin lid, or even a large, shallow cardboard box lined with plastic will work. Anything flat and waterproof that can contain the foamy mess.
- Paper: Cardstock or watercolor paper works best as it’s sturdier and less likely to wrinkle or tear when wet. Regular printer paper can be used, but it will be more delicate.
- Something to Swirl With: A craft stick, the end of a paintbrush, a skewer, a fork, or even just fingers!
- A Scraper: A piece of stiff cardboard, an old ruler, or a squeegee works well to scrape off the excess shaving cream.
- Paper Towels or Wipes: Essential for cleanup! Keep them handy.
- Optional: An Apron or Old Clothes: Things might get messy, so protecting clothes is always a good idea.
- Optional: Glitter: For an extra touch of sparkle, sprinkle some fine glitter onto the colors before swirling.
Let’s Make Some Marbled Magic: Step-by-Step
Step 1: Prep Your Workspace
Cover your table or floor area with newspaper or a plastic tablecloth. This activity is inherently messy (that’s part of the fun!), so preparation makes cleanup much easier. Put aprons on the kids and have your paper towels ready.Step 2: Create the Shaving Cream Canvas
Shake the shaving cream can well. Spray a generous layer of shaving cream onto your tray or container. Spread it out relatively evenly with your hands or a spatula to create a smooth, white surface about half an inch to an inch thick. The size of your canvas should be slightly larger than the paper you intend to use.Step 3: Add Drops of Color
Now for the exciting part! Randomly drop small amounts of your chosen liquid food coloring or washable paint onto the surface of the shaving cream. Don’t go overboard – a few drops of each color spread out are usually enough to start. Using 2-3 colors often yields the best marbled effect without becoming muddy.Step 4: Swirl and Twirl
Take your swirling tool (or finger!) and gently drag it through the drops of color and the shaving cream. Make swirls, zig-zags, wavy lines, or any pattern you like. The goal is to create beautiful marbled patterns without over-mixing the colors. If you mix too much, the colors will just blend into a single brownish or greyish hue. Less is often more here!Step 5: Press Your Paper
Carefully take a sheet of your paper (cardstock is recommended) and lay it flat onto the colorful shaving cream surface. Gently press down all over the paper, ensuring the entire surface makes contact with the swirled colors. Don’t wiggle it around too much; just a firm, even press.Step 6: Lift and Reveal (Almost!)
Carefully peel the paper up from one corner. It will be covered in a layer of colorful, patterned shaving cream. At this point, it might look like a bubbly mess, but the magic is about to happen!Step 7: Scrape Off the Excess
Lay the paper down flat (shaving cream side up) on your protected work surface. Take your scraper (cardboard piece, ruler) and, starting from one edge, make one clean, smooth scrape across the surface of the paper. This removes the shaving cream, magically revealing the vibrant marbled pattern underneath! Scrape the excess foam onto a paper towel or back into the tray if you plan to make more prints immediately.Quick Tip for Vibrant Prints: Use cardstock or watercolor paper for the best results. These thicker papers absorb the color well without becoming overly saturated or wrinkly. Ensure you scrape the shaving cream off in one smooth motion for a clean reveal of the pattern.
Step 8: Let It Dry
Place your beautiful marbled paper somewhere safe to dry completely. This might take anywhere from 30 minutes to a few hours, depending on the paper and humidity. Once dry, the stunning patterns are permanent!Tips for Terrific Results and Easier Cleanup
Want to make your shaving cream art session even smoother? Here are a few extra pointers:- Don’t Skimp on Cream: Ensure you have a thick enough layer of shaving cream to allow for good swirling and color transfer.
- Go Easy on Swirling: Remind kids that gentle swirls create the best marble effects. Too much mixing leads to muddy colors.
- Multiple Prints: You can often get a second, lighter print from the same shaving cream setup. Just lay down another piece of paper after the first lift. You might need to add a few more drops of color for subsequent prints.
- Cleanup Strategy: Have a tub of soapy water or a stack of wet wipes nearby for immediate hand cleaning. The tray itself can usually be rinsed clean easily, especially if tackled before the foam dries out completely.
- Embrace Imperfection: Every print will be unique! Encourage kids to enjoy the process and not worry about making it ‘perfect’. The unpredictable nature is part of the charm.
- Experiment with Colors: Try contrasting colors, complementary colors, or even just shades of a single color for different looks.
Beyond the Basic Print: More Foamy Fun
Once you’ve mastered the basic marbled paper technique, why stop there? The shaving cream itself offers plenty of play opportunities.- Sensory Bin Base: Before adding color, just let younger children explore the plain shaving cream in the tray. Add plastic toys, scoops, or cups for extra tactile play.
- Window/Mirror Painting: Spray shaving cream directly onto a window or large mirror (check surface suitability first!). Kids can draw, write letters, or make patterns with their fingers, and it wipes clean easily.
- Bath Time Fun: A small amount of shaving cream can make bath time extra fun. Kids can ‘paint’ the tub walls before it all washes away.
- Using the Marbled Paper: Once your beautiful papers are dry, use them for other crafts! Cut them into shapes, use them as backgrounds for drawings, make greeting cards, or create unique collage elements.
- Tool Exploration: Try different items for swirling – combs create interesting lines, forks make parallel tracks, bubble wrap pressed gently can make dot patterns.
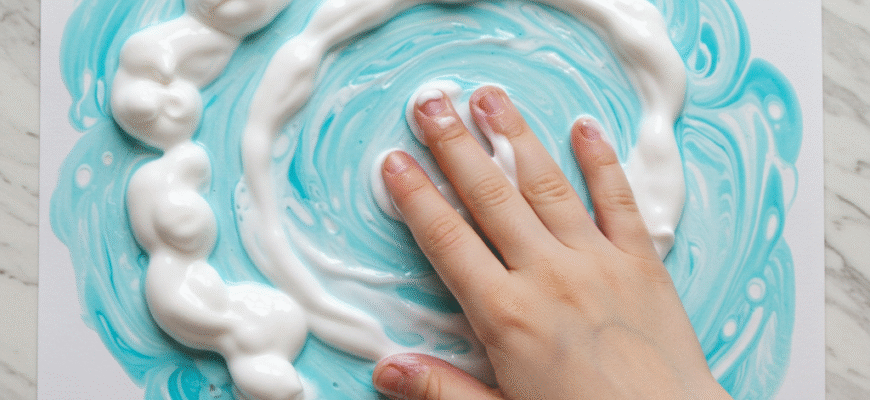
Diving Deeper into the Sensory Experience
Let’s really appreciate the sensory power of this activity. For many children, especially those who seek out tactile input or those who might be hesitant about messy play, shaving cream provides a fascinating medium. The initial cool touch can be alerting, while the smooth, pillowy texture as it’s spread can become very calming. Watching the vibrant colors bleed and swirl is visually stimulating and almost hypnotic. Encourage children to describe what they feel – Is it cold? Soft? Squishy? Slimy? What do they see happening with the colors? Does the smell remind them of anything? This verbal processing helps them make sense of the sensory information they are receiving. For hesitant children, start small. Let them poke it with one finger or a tool first, gradually encouraging more contact as they feel comfortable. The key is a pressure-free environment where exploration is encouraged at the child’s own pace.Important Safety Notes: Always ensure close adult supervision, especially with young children who might try to taste the shaving cream. Use non-toxic shaving cream and non-toxic, washable colorants (food coloring or washable paint). Be aware of potential skin sensitivities or allergies to fragrances or ingredients in the shaving cream; consider a small patch test first if concerned. Keep the activity area clear to prevent slips if foam gets on the floor.


